There are several different specific technique options for knitting in the round, which will all accomplish the same end result: a round tube of knit fabric, which could be small (like a sock) or large (like a sweater body). This is an alternative to using 2 straight needles and having to sew a seam, and it simplifies your knitting by making every row a right side row, which is actually called a "round" when you're working in the round.
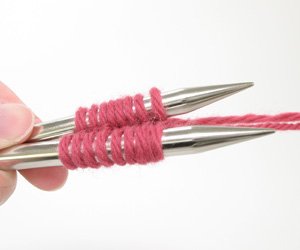
One Circular Needle
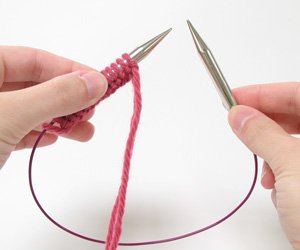
Let’s talk about working a tubular piece of knitting on a single circular needle. This method is simpler than using other circular methods or using double pointed needles. Some of the benefits of using a single circular needle for round knitting are that you do not have to worry about misplacing one of your needles, you have fewer needle tips to keep track of, no seam to sew, and it is easier to handle a larger tube of knitting such as a sleeve, hat, or body of a garment. Always use a circular needle with a shorter length than the circumference of the item you are knitting. If your hat will be 18 inches around when finished, use a 16 inch long needle. The reason for this is that the stitches need to fit comfortably around the needle and meet at the tips without stretching. Using a needle that is too large can result in misshapen fabric.
Always use a circular needle with a length less than the circumference of the item you are knitting. If your hat will be 18 inches around when finished, use a 16 inch long needle. The reason for this is that the stitches need to fit comfortably around the needle and meet at the tips without stretching. Using a needle that is too large can result in misshapen fabric.
Note: We have already cast on our stitches and are ready to knit. If you need instructions on how to cast on, click here.
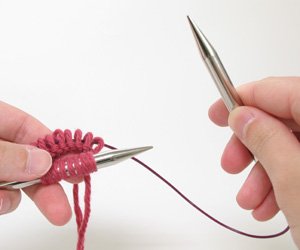
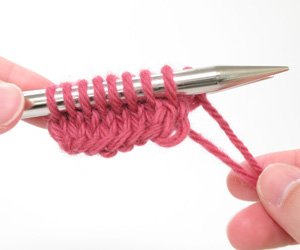
Step One
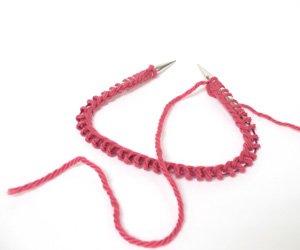
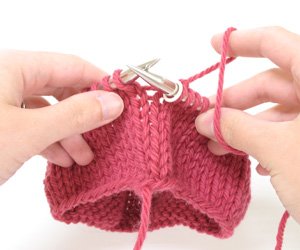
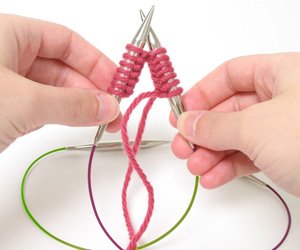
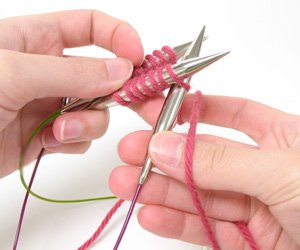
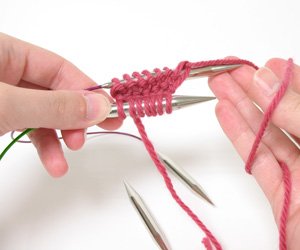
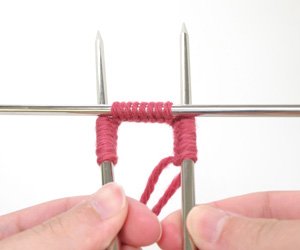
Push the last of your cast on stitches to the tip of the needle so that the working yarn is close to the tip. Hold this needle tip in your right hand. Pick up the other needle tip with your left hand. Slide the stitches to the end of the needle tip now in your left hand. Before you knit your first stitch, ensure that there is no twist in the cast on stitches. The cast on edge should run along the bottom of the needle all the way around without looping over the cable.
Note: Avoid twisting.
An unwanted twist would find the cast on edge wrapping all the way around the cable. This would cause your knitted piece of fabric to become somewhat of a figure eight. Twisting is a problem that cannot be corrected later — you would have to tear out all of your work and start over.

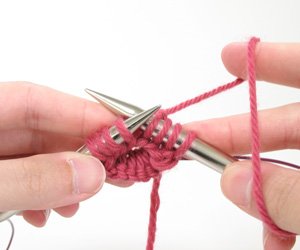
Step Two
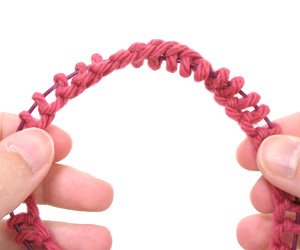
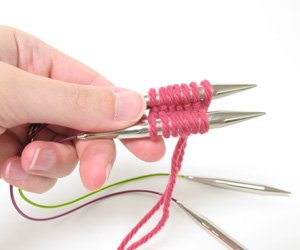
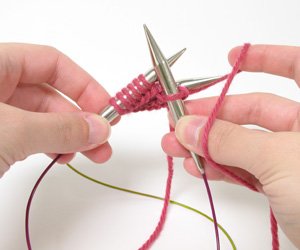
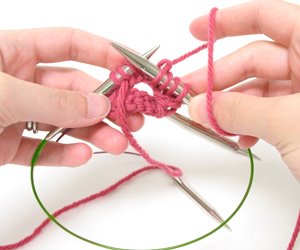
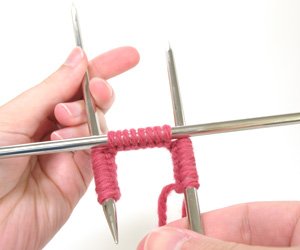
Place a marker on the right needle tip before you begin knitting. This will allow you to keep track of the beginning of the round for counting purposes. Begin knitting by inserting the right needle tip into the first stitch on the left needle tip. Using the working yarn, knit the first stitch and pull tightly so that it comes together snugly with the stitches on the right needle tip. Take care not to knit with the cast-on tail! You always want to be knitting with the working yarn that comes from the skein.
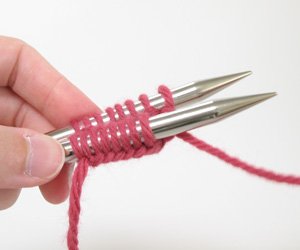
Step Three
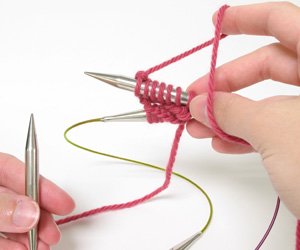
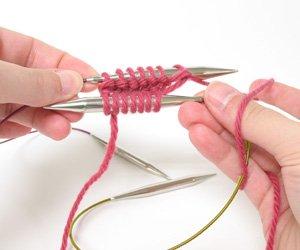
Keep knitting until you have come back around to the marker. Every time you reach the marker you have completed one round of knitting. Now you can just continue to knit and you will produce a beautiful tube of stockinette fabric without having to do a single purl stitch!
When knitting in the round, you are always working on the “right side” of the fabric. In the event that you are reading from a charted pattern, you will now read each and every row from right to left and all stitches will be knit as for the “right side” of the fabric. For instance: if a stitch says “knit on right side, purl on wrong side”, you will now be knitting that stitch every time you come to it. Please see our Chart Reading Tutorial for more information about charts.
If you are converting a pattern from flat knitting to circular, you must be aware of the fact that the “wrong side” rows will all need to be changed. For instance: stockinette stitch fabric is created in flat knitting by alternating knit rows with purl rows. When knitting in the round, you must knit every round to create stockinette stitch since you are never turning your work.
Two Circular Needles
Learning to knit in the round with 2 circular needles is challenging, but well worth it in the end. Try this technique first with one sock, and as you become more comfortable you can perform the amazing feat of knitting two socks at the same time! This allows you to try on the socks as you progress in knitting them, and avoid the dreaded “second sock syndrome”. (This happens when you finish knitting one sock and then don’t have the heart or motivation to pick up and make the second sock.)
Important Tip: Create a distinguishing feature between the needles. This will make it easier to keep track of which needle is the back and which is the front. You don’t want to use anything that will obstruct your knitting. The best ideas are to use two different types or colors of circulars or to make a small mark with a permanent pen on one cable.
Step One
First, cast on the necessary number of stitches onto one of the circular needles.
Step Two
Slip half of the stitches purlwise onto the second circular needle. (The second circular needle has been rendered in green for clarity.)
Step Three
Holding the needles parallel to one another, slide the stitches from the needle tips they are on to the needle tips at the opposite ends of the cables. This will ensure that the working yarn is hanging to the right of the stitches, ready to begin knitting.
Step Four
Using the front circular only, pick up the free end and insert it into the first stitch on the front needle.
Step Five
Complete the first stitch, pulling snugly with the working yarn to join the stitches into a round.
Step Six
Work across the rest of the stitches on the front needle and allow the free end of the needle to drop.
Step Seven
*Turn your work.
Step Eight
Slide the stitches that are on what is now the front needle to the opposite needle tip.
Step Nine
Picking up the free end of the front needle, work this row and let the newly emptied needle tip drop.
Repeat these steps from *.
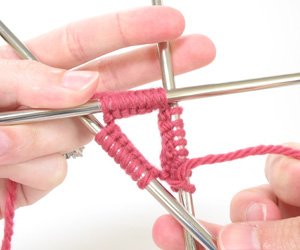
Double Pointed Needles
You can use double pointed needles to knit tubes of fabric with small circumferences. Examples would be socks, hats, and the sleeves of sweaters. Double pointed needles (commonly referred to as DPNs) come in packages of 4, 5, or sometimes 6 needles. You can choose to knit around 3 or 4 needles, depending on the size of your project and your personal preference. Our example below will demonstrate knitting in the round over 3 needles, using a 4th needle to complete the knit stitches.

Step One
First, begin by casting on the required number of stitches onto one of the double pointed needles.
Step Two
Slip one third of the stitches purlwise onto a second double pointed needle.
Step Three
Repeat with the third double pointed needle, leaving you with your stitches divided amongst the three needles.
Step Four
Arrange your needles in an “H” shape with the working yarn hanging off of the righthand needle as pictured. Make sure that the stitches do not twist around any of the needles. The cast on edge should face downward on all three needles.
Step Five
Slide the stitches on the lefthand needle down to the tip closest to you. These are the stitches you will be knitting first.
Step Six
Insert your fourth needle (the empty one) into the first stitch on the lefthand needle.
Step Seven
Grasp the working yarn with your right hand and work the stitch you have just inserted your fourth needle into. You have just joined the stitches and are effectively working in the round!
Step Eight
Work the rest of the stitches until you have freed up a needle. You will now use this free needle to work the next set of stitches on the needle to the left of the working yarn.
Remember, if you put down your work and can’t figure out where you left off, you should always be working the stitches on the needle that is to the left of the one with the working yarn hanging from it. It is very helpful to use a stitch marker to mark the beginning of the round. However, you may want to shift the stitches so that the marker does not fall between two sets of stitches as it can slip off of the end of a needle. Make sure the first stitch on each new needle is worked snugly, as this will prevent any looseness from appearing in your piece between needles.
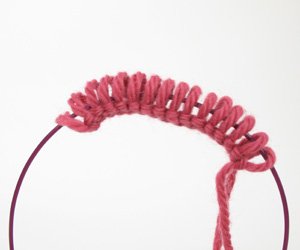
Magic Loop
This fabulous technique (developed by Sarah Hauschka and Bev Galeskas in The Magic Loop) allows you to create a small tube such as the leg of a sock, on one circular needle! By taking advantage of the flexible cable on a circular needle, you have an alternative to knitting a sock or a sleeve on double point needles. It is a truly wonderful concept.
First, you’ll need a long circular needle. Since the cables on Knit Picks needles are so flexible, the Magic Loop technique can be performed on our 32″ cable or anything longer – we also carry cables in 40″, 47″, and 60″ lengths. Some customers claim they have even used our 24″ needles successfully!
Step One
Cast on your required number of stitches and push them down to the middle of the cable.
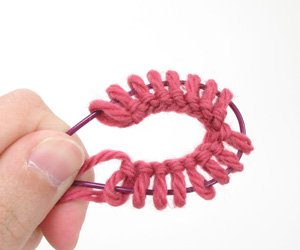
Step Two
Divide the number of stitches in half. Fold the cable so that half of the stitches are on one side and half on the other.
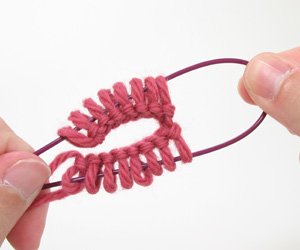
Step Three
Pull on the bit of cable that appears between the two groups of stitches.
Step Four
Slide the two groups of stitches down their sides of the cable to their respective needle tips. You will now have half of your stitches on one needle tip and half on the other. With the needle tips parallel and pointing to the right, your working yarn will hang from the back stitches.
Step Five
*Pull on the needle tip that is holding the back stitches and draw up enough slack on the cable to allow you to use that needle tip to work the stitches on the front needle.
Step Six
Work all of the stitches on the front needle, being careful that you haven’t twisted the stitches around on either needle. (You’ll want to see the cast on edge all around the bottom.)
Step Seven
Slide the two groups of stitches back down to their respective needle tips. Repeat from * as many times as needed.
Step Eight
After several rounds you will begin to see your tube of knitting appear. Each time your yarn tail hangs at the right side of your stitches with the working yarn, you are beginning a new round.
As with all knitting skills, this one may take some time to get used to. Once you learn the proper tension for your style, you’ll be sure to appreciate the grace and simplicity of this method.