Short rows are a technique used to knit partial rows in knitting to create 3-dimensional shaping or add wedges of length, which can be stacked in a balanced way or not, depending on the pattern. The way they’re worked is quite simple: instead of knitting to the end of a row, only a select number of stitches are knit before turning. To prevent a hole at the turning point, an extra step needs to happen, and one of the most common methods to prevent the hole is by working a W&T, short for “wrap and turn.” Another common method is called German Short Rows, but W&T is the most beginner-friendly way to work short rows. Short rows can be worked from shortest to longest, longest to shortest, or any other combination.
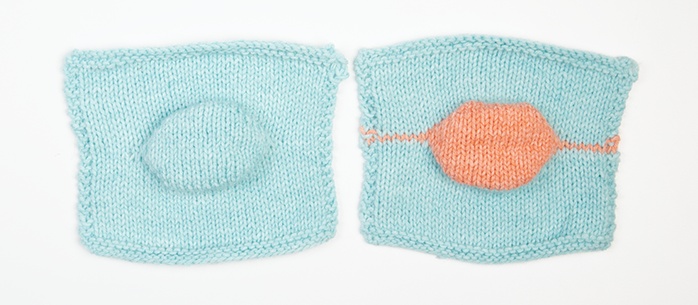
These swatches show many W&T short rows worked within one row at the center. First a set of shortest to longest short rows are worked, and then stacked on top of them are a mirrored set, worked longest to shortest. This creates a bubble in the fabric. Both swatches have the same series of W&T shorts rows, wth the swatch on the right showing the row with short rows in a contrast color.
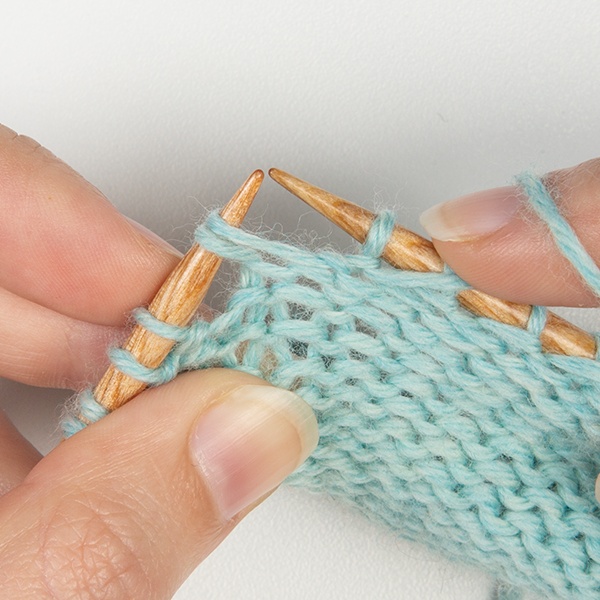
W&T While Knitting
Knit the number of stitches specified for your first short row. This will include the stitches that are needed to position the short row, worked from the start of the full row.

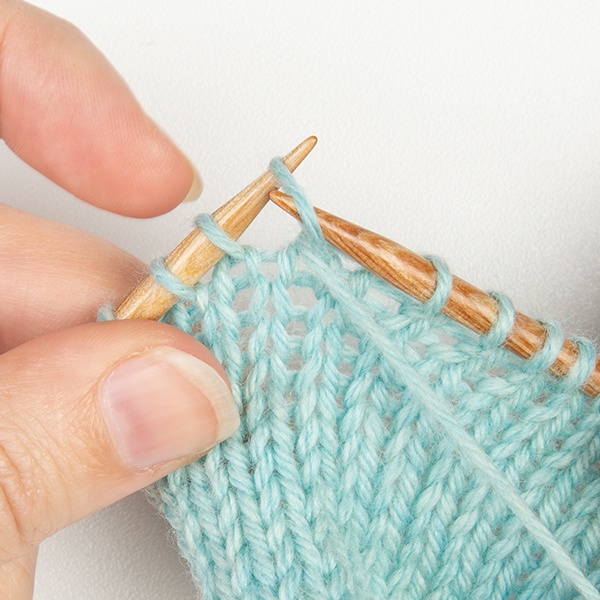
Step 1
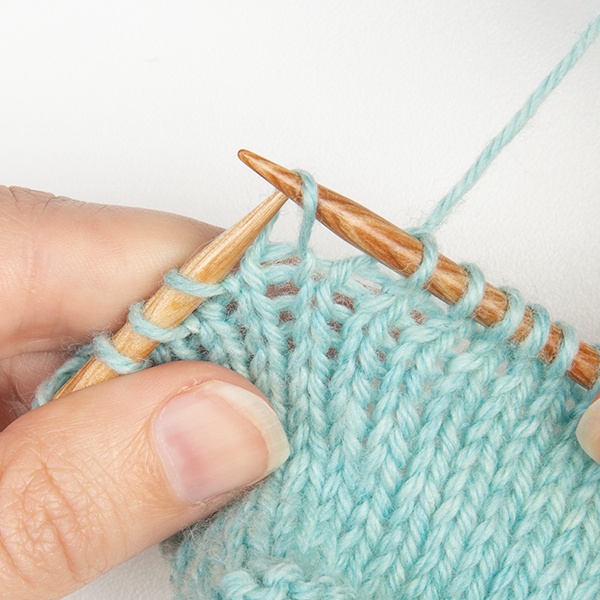
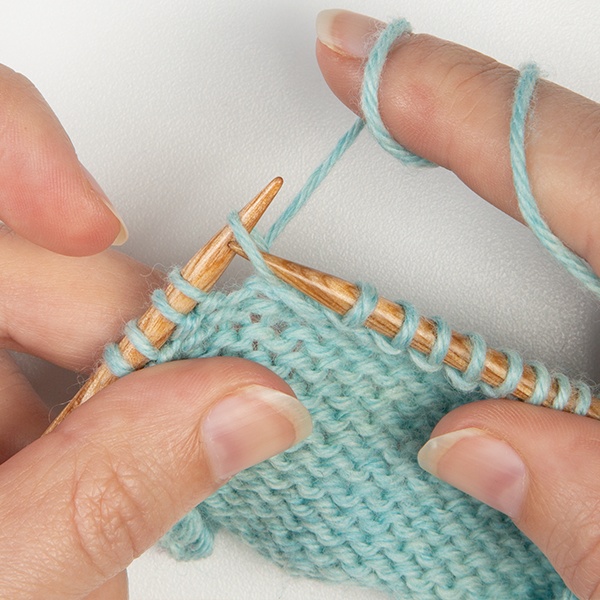
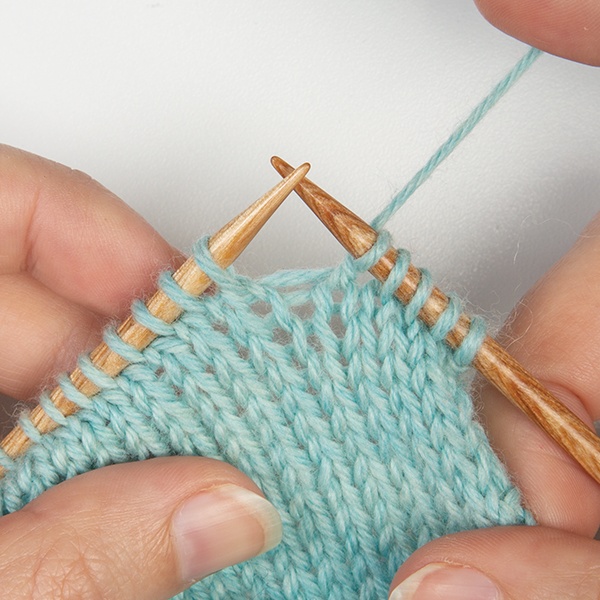
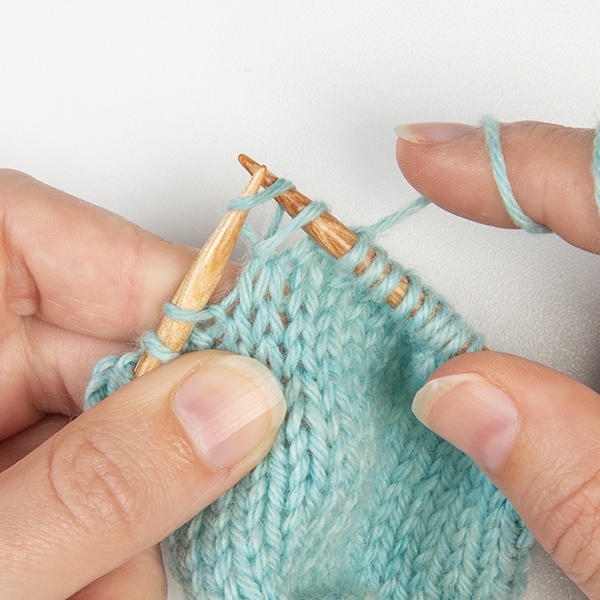
On a knit row, with your yarn held to the back, slip one from the left needle to the right. It can be slipped knitwise or purlwise, but remember the direction used. This stitch is being slipped purlwise.
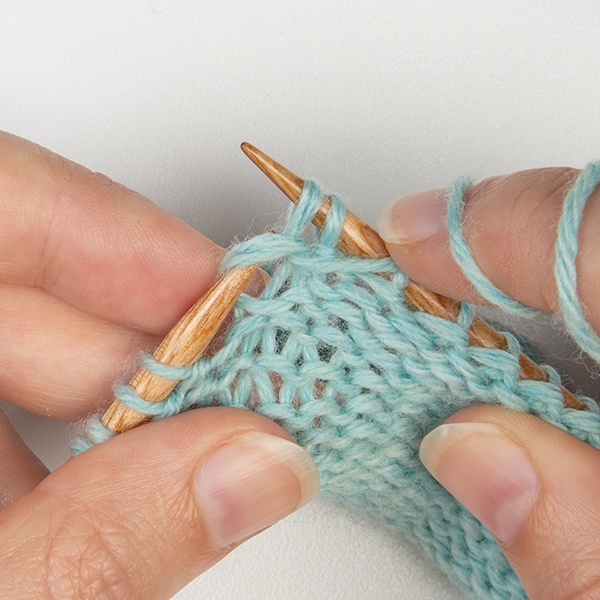
Step 2
Bring the yarn to the front.
Step 3
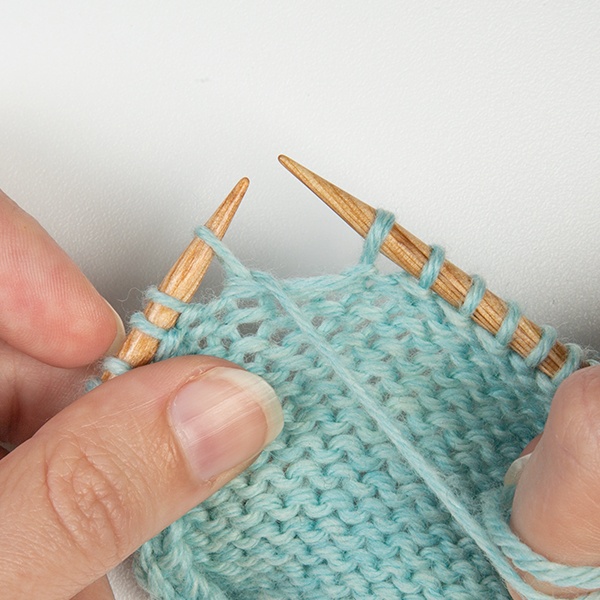
Slip the stitch on the right needle back the left needle in the same direction it was slipped previously to avoid twisting.

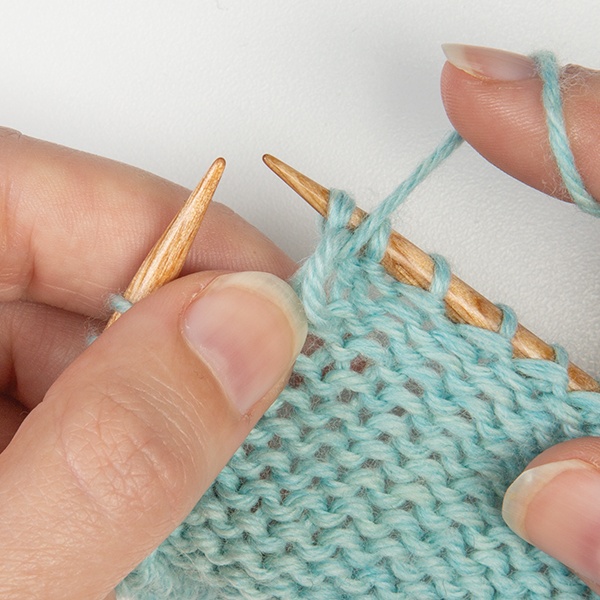
Step 4
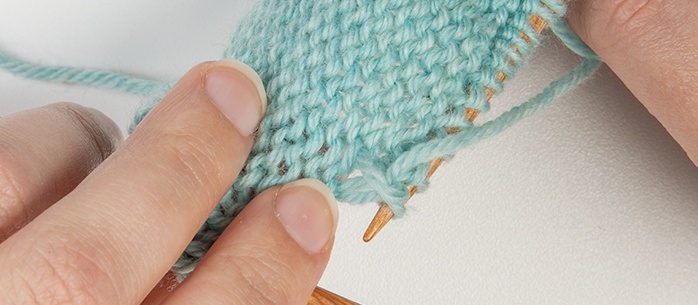
Bring the yarn to the back to complete the wrap.
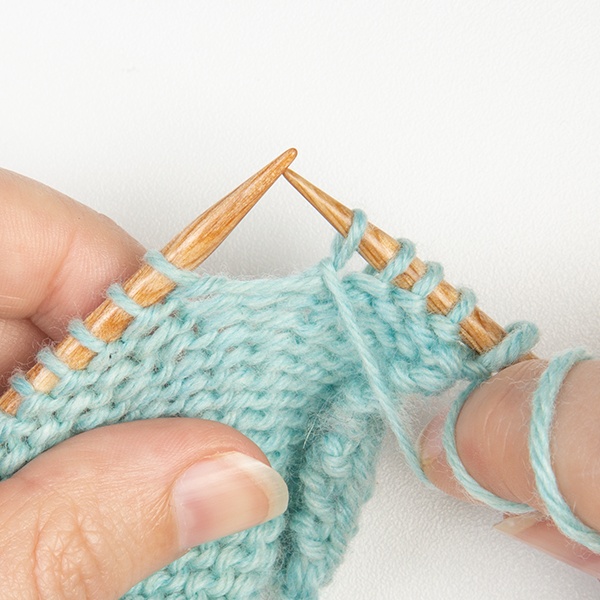
Step 5
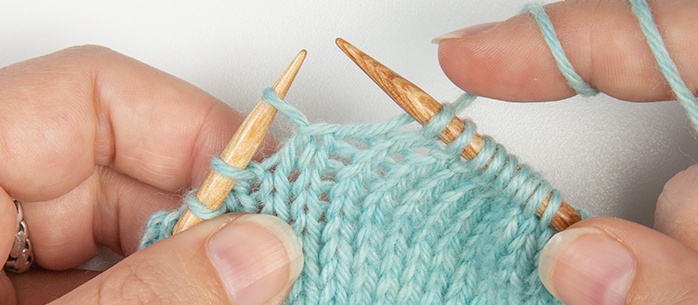
Turn your work, and you’re ready to continue working more short rows.
W&T While Purling
Step 1
On a purl row, with your yarn held to the front, slip one from the left needle to the right. It can be slipped knitwise or purlwise, but remember the direction used. This stitch is being slipped purlwise.
Step 2
Bring the yarn to the back.
Step 3
Slip the stitch on the right needle back the left needle in the same direction it was slipped previously to avoid twisting.
Step 4
Bring the yarn to the front to complete the wrap.
Step 5
Turn your work, and you’re ready to continue working more short rows.
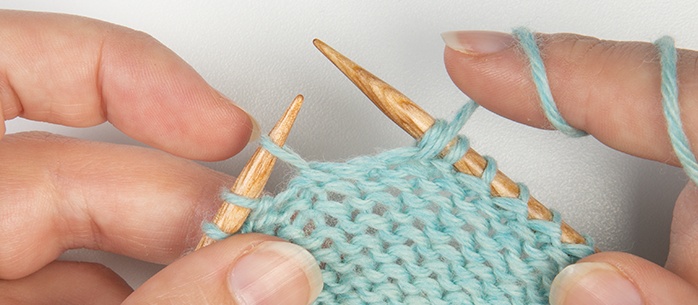
Picking Up Wraps (Knit)
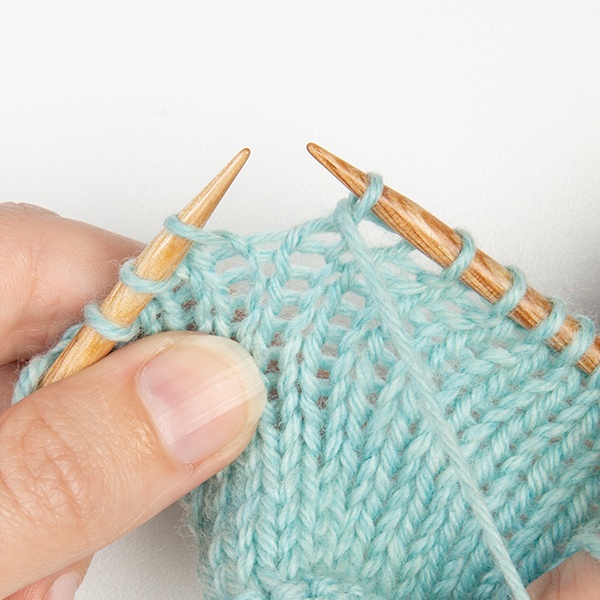
When you reach the wrapped stitches on following rows, you can decide if you’d like to pick up and knit together your wrap with the wrapped stitch. This is an aesthetic choice, because the wrap is anchored and functional whether they’re picked up and knit together or not. Picking up and knitting the wrap hides it on the wrong side of your knitting and makes it blend better into stockinette. For textured stitch patterns like garter stitch or seed stitch, wraps are often left where they are because they blend in well as they are, and the wrapped stitch is worked into like a normal stitch.
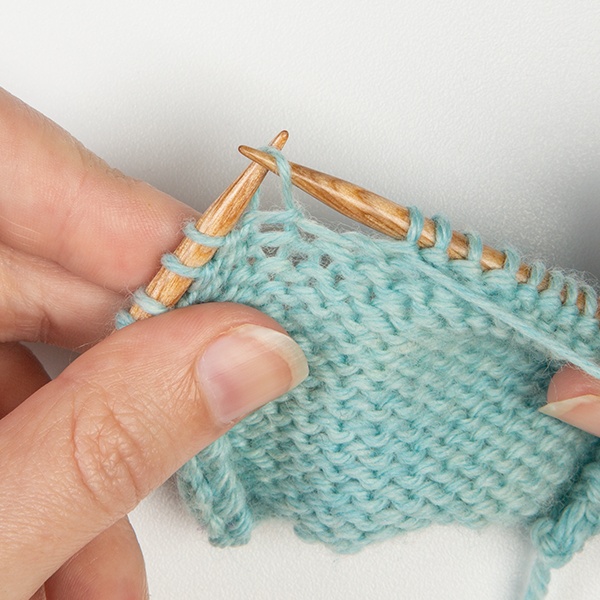
Step 1
To pick up and knit a wrap together with the wrapped stitch, insert your needle into the wrapped stitch below the front wrap.

Step 2
Knit as normal to knit the two together.
Picking Up Wraps (Purl)
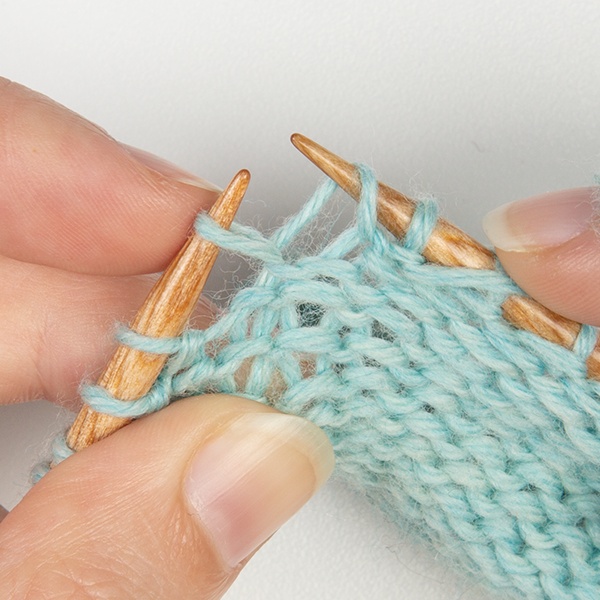
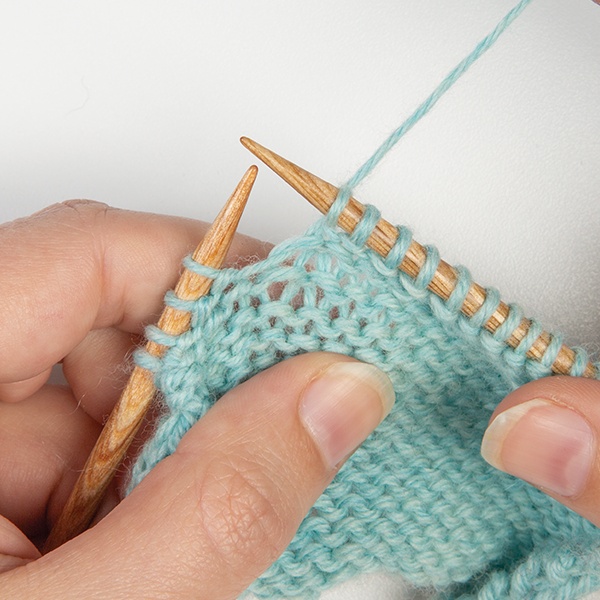
Step 1
To pick up and purl a wrap together with the wrapped stitch, insert your right needle through the back of the wrap
Step 2
Slip it onto the left needle.
Step 3
Purl the wrap and the wrapped stitch together.
This hides the wrap on the WS of stockinette.