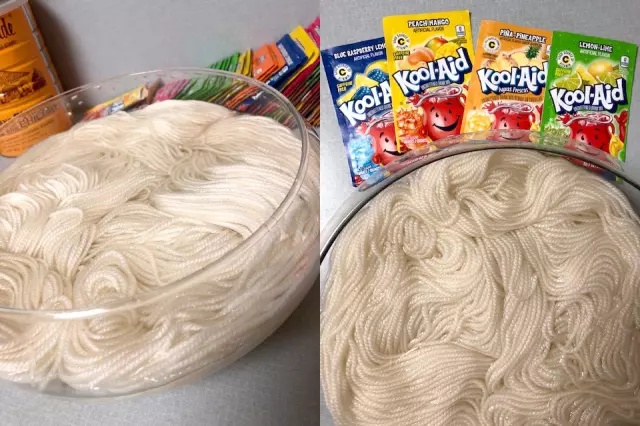
Did you know you can experiment with dyeing yarn in your kitchen, using food-safe & low-cost products, and get some really cool results? What a great way to play with our Bare Yarns!
Kool-Aid Dyeing in a Microwave
All the yarns shown were dyed with Kool-Aid or other brands of unsweetened drink mixes, in a kitchen. There are lots of different ways you can dye yarn with Kool-Aid, but here we’ll show you our favorite method–in the microwave!
Supplies Needed to Get Started
- Bare Yarn
- Kool-Aid drink mix or other unsweetened drink mix in a range of colors
- White Vinegar
- Rinse Bucket
- Glass bowl or other microwave-safe bowl
- Colander
- Plastic wrap
- Microwave
Choosing Colors
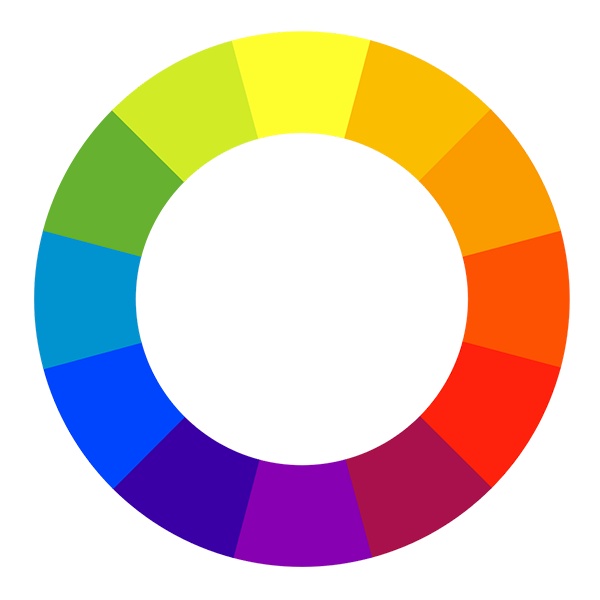
Something you may want to think about when planning your project is color mixing, how to get the colors you want. Kool-Aid doesn’t limit you to just the base powder colors—you can mix, overlap, and over-dye! The way to darken or mute colors isn’t to use more or less of a color. Instead, adding some of a complementary color (opposite on the color wheel) could achieve exactly the results you’re after. For example, adding a little orange to a blue will make a darker, less vibrant blue, and vice versa. For example, adding some orange to green creates a more olive, darker shade of green.
It doesn’t have to be the exact complementary color; you can try mixing colors that you might not think would mix well just to see what results you get. You can also try mixing a little drink powder in a cup with water, and then dipping a white paper towel into the mixed dye to get an idea of the color you’re making, before using it on your yarn.
Preparing Yarn
You’ll want at least THREE ties in your hank so it doesn’t end up a tangled, wet mess—not all of our Bare yarns come with three ties, so you may need to add one yourself. We recommend using a cotton yarn for ties.
Soak the yarn in water with a big splash of white vinegar for an hour or longer. The Kool-Aid has acid in it so it’ll set onto the yarn without the vinegar, but vinegar can help make it a bit more colorfast in the long term. If dyeing several hanks, soak them all in vinegar water in a big bowl or bucket together, then take them each out to dye one at a time in a separate bowl.
Dyeing Yarn
Step 1: Place your hank in a glass or otherwise microwave-safe bowl with just enough vinegar water to cover the top of it.
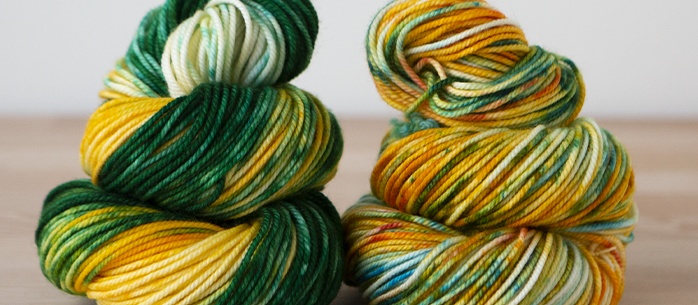
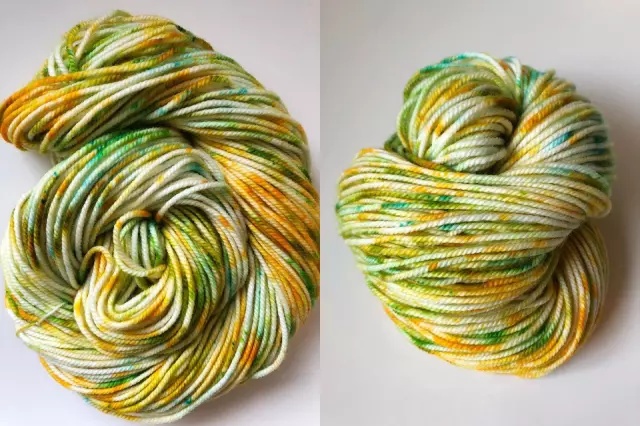
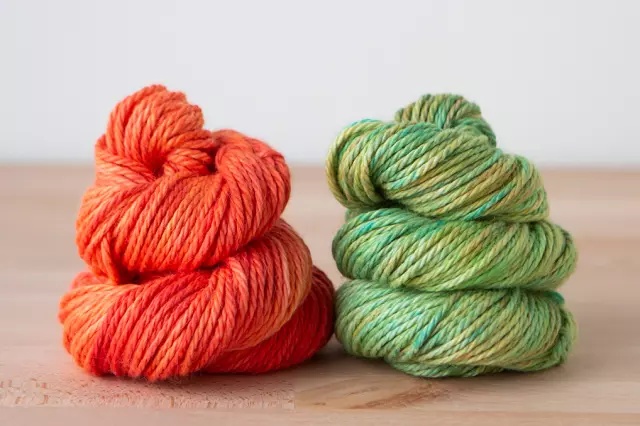
Step 2: If you want to dye the hank in a certain pattern, like with different colors on different sections of the loop, then position the yarn intentionally. For this hank, the goal was all-over speckled variegation, so it was purposely left messily positioned in the bowl.
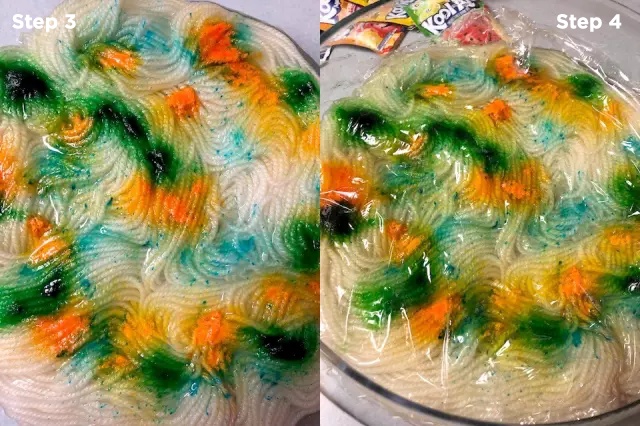
Step 3: Next sprinkle on some powder! For this yarn, the oranges, greens, and blues were purposely allowed to overlap and mix. Take note of the color wheel to strategize your color blending.
Step 4: After the drink powder has been sprinkled on as desired, cover the yarn with plastic wrap and microwave it for 1 minute.
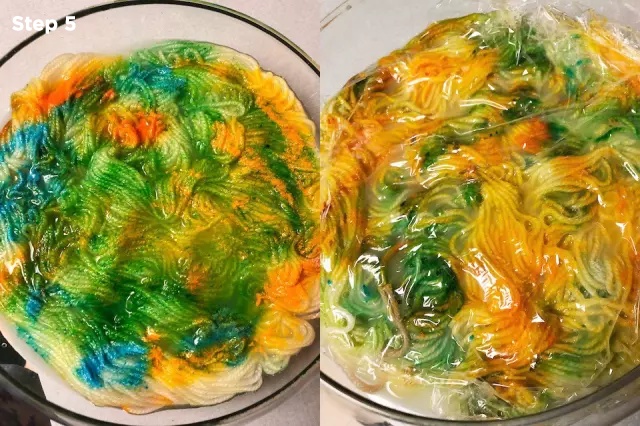
Step 5: When you take it out, the powder should be mostly absorbed into the yarn. If more color is desired, repeat Steps 2-4, repositioning the yarn and dyeing more, until you’re happy with it. Your exact process may vary depending on how you want your yarn to look. The yarn shown here was flipped upside down with more drink powder added and microwaved a minute 3 more times, for a total of 4 dye applications.
Tip: Never microwave for more than 1 minute at a time to avoid scorching the yarn.
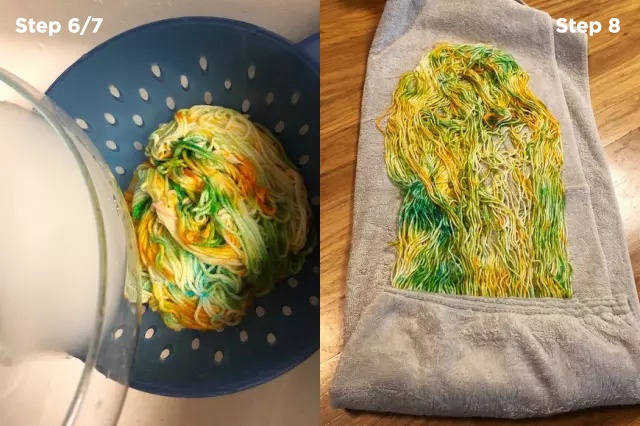
Step 6: When the water looks clear, the dye is set! Dump the yarn into a colander to cool to room temperature. Below, left you can see how the water is cloudy, but white, no dye. As long as there is no colored dye left in the water, it means the dye has set into the yarn, not in the water. That’s the important part!
Step 7: Rinse it in water that’s the same temperature as the yarn very gently. If you want to get the vinegar smell out, you may choose to wash the yarn with a wool wash now, but rinsing is sufficient to prepare it to knit.
Step 8: Gently squeeze the water out in the sink, then roll the hank up in a big towel, and gently press on it to squeeze the remaining water out. Shake it out, and hang it to dry over a hanger, shower curtain rod, or coat rack. It could take a couple of days to dry completely. Reposition a few times to help it dry.
Is Kool-Aid Dyed Yarn Colorfast, Or Does It Wash Out?
Knit Picks staff have yarns that were dyed using this method over 12 years ago that are still bright and vibrant, but we can’t say they’re 100% colorfast, because dye quality varies. Some yarns dyed many years ago look lighter, but they’re still colorful, even if slightly faded over a decade of use. We do recommend storing items away from direct sunlight to help preserve the color.
Have Fun and Experiment
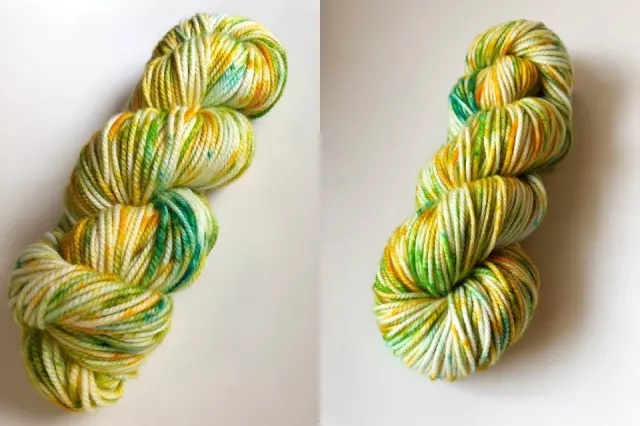
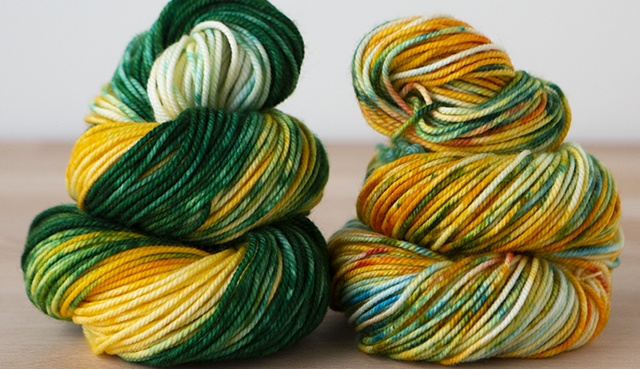
This method is great for variegated looks with the white showing through, but if you want a more saturated look, just use a bit more water and stir to mix the dye around for full coverage. Below are two more hanks of the same Bare Superwash Merino Twist dyed with similar Kool-Aid colors in different ways. The left-hand one was actually partially dyed on the stove first, for the dark solid green section and then overdyed more in the microwave, and the right-hand one was using the same microwave method above.
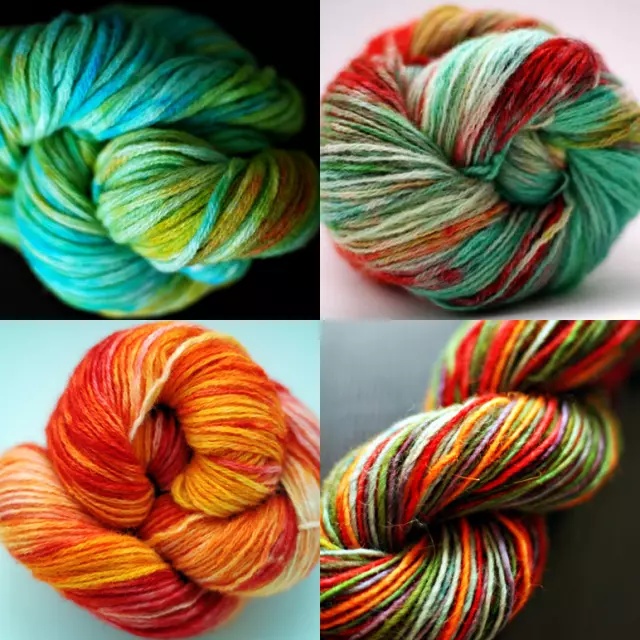
There’s also the option of dyeing vibrant Kool-Aid colors over the top of other colors. Using our Simply Wool & Simply Alpaca yarns as bases instead of Bare can get you beautiful, darker, toned-down color results!
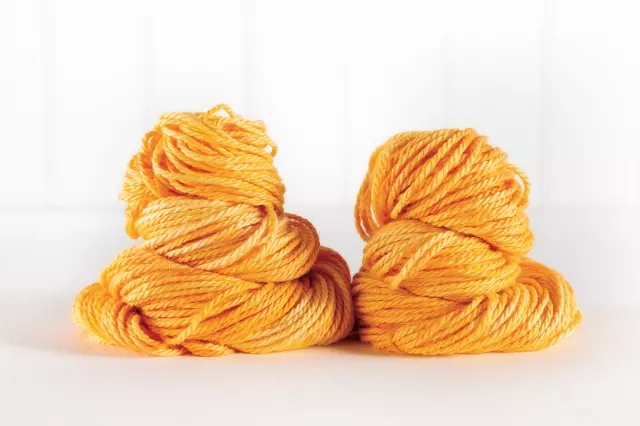
Those are two hanks of bare yarn that were dyed using the same microwave method with a couple of shades of orange/yellow, for a tonal hue.
They were then over-dyed each separately, with totally different colors (below). On one, a few shades of red and pink were overlapped, for kind of a tonal coral; on the other, blues and greens were used, which mixed with the light orange base to be more muted versions of those colors.
Orange and blue are complementary colors, so adding blue and green to that orange base worked to tone down the shades. If the orange and blues were mixed at the same time, it might have been muddier than how it turned out with this over-dyeing method. This kind of color mixing is a lot of experimentation.You can always dye a very small amount of yarn first to try out a color idea, before using a whole hank.
This is a great project for any knitter, and because it uses food-grade dyes, it would also be a really fun activity to do with kids to give a hands-on lesson on the basics of color theory, or just to play and have fun!