
Learn how to create variegated, multicolor yarns with the hand painted dyeing technique using acid dye powders! Hand painted dyeing is the process of adding dye to yarn by hand to create more precise, exciting color combinations.
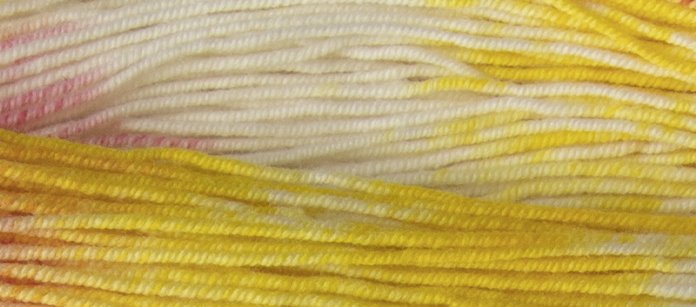
Acid Dye Hand Painted
Supplies Needed To Get Started!
- Bare Yarn (High Desert 100g skeins used for this tutorial)
- Oven
- Gloves
- Drop Cloth
- Rinse Bucket
- Drying Rack
- Aluminum Foil
- White Vinegar or Citric Acid
- Acid Dye Powder such as Jacquard Dye or Greener Shades Acid Dye
- Dye-Dedicated Hotel Pan or Baking Pan
- Tongs
- Spoons
- Measuring Spoons
- Measuring Cup
Optional:
- Shower Curtain Rings: put these through the hanks to get a grip on them and hang them up without tangling.
- Apron: Not required, but nice to have on hand.
- Mask/Respirator: You should be dying in a well ventilated area, but masks are an extra layer of protection. Research the specific dyes you will use as manufacturers will state whether or not a mask is required for safety.
TIP: Write everything down as you go! There are many steps and you do not want to rely on memory for your calculations. This is also helpful to go back to if you want to re-create a certain dyed fiber.
STEP 1: Start by weighing the amount of fiber you will be dyeing. Consult the yarn label for the weight if you do not have a scale.
STEP 2: Fill rinse bucket with warm water and add either 1/4 cup of white vinegar OR 1 Tbs of citric acid per lb. of fiber. Stir and make sure it is all dissolved.
- This activates the acid dye and makes the color adhere to the fiber.
- Unlike white vinegar, citric acid has no smell, which may be more appealing to use. It can be found with canning and preserve supplies at the grocery store.
- Per 100g skein of High Desert Bare:
- 1 tbs or vinegar or 0.5 tsp citric acid
STEP 3: Soak the fiber in the acidic water for at least 15 minutes.
STEP 4: Prepare the dye: Glove up!
- For each color being used, add 1 tsp powdered dye to 1/2 cup of warm water and stir. You can also use squeeze bottles.
STEP 5: Remove yarn from acidic water and squeeze out the excess water. Lay yarn out in the pan.
STEP 6: Using the concentrated dye mix, apply the dye where desired by pouring, using squeeze bottles, or painting.
*Be aware that colors placed close to each other may mix*
- Blue and yellow next to each other will mix to green.
- Blue and orange next to each other will mix to brown.
- Fades and ombres are also possible with this technique.
STEP 7: Cover the pan with aluminum foil and place in a 350° oven for 30-45 minutes.
- Longer dye periods generally create more saturated colors, but do not leave yarn more than an hour or it may scorch.
- Blues typically take closer to 45 minutes.
STEP 8: Remove pan from oven and let it cool for several minutes.
- While it cools, prepare your splash sink or rinse bucket with COLD water.
STEP 9: Remove fiber from pan and rinse THOROUGHLY with COLD water. Gloves on!
- Continue to rinse until water runs clear.
- The cold water preserves the vibrancy of the color.
- Gently squeeze out any water once it runs clear and hang up to dry.
STEP 10 (optional): Soak the dyed yarn in warm water and wool wash/light detergent for 15-20 minutes, rinse, squeeze out excess water, and hang to dry.
- This removes all the excess dye left behind. The reason some yarns bleed when your finished product is blocked is because this step was not done.
TIP: Place a sheet of Shout Color Catcher into the wash water during Step 10. This absorbs any dye that is free-floating in the water. Also do this when wet blocking finished projects to contain bleeding. They can be found in the laundry detergent aisle at the grocery store.
STEP 11: Dry on a rack in a well-ventilated area that has a tarp or floor covering. Allow the dyed skeins to hang with room between skeins. Drying may take several days, depending on the humidity in your location.