
Now that you understand how cables are made, you may consider cabling without a cable needle! This skill will make cable-heavy projects go much more quickly, and allow you to make a cable anywhere, even if you forgot to bring a cable needle along.
To make a cable twist without a cable needle, you’ll be first rearranging the order of the stitches on the needles, then knitting them.
Note: this technique is especially easy and risk-free if you’re using a “sticky” wool or rugged cotton yarn, rather than a slippery silk or alpaca fiber.
How to do it:
Left Cable
Step 1
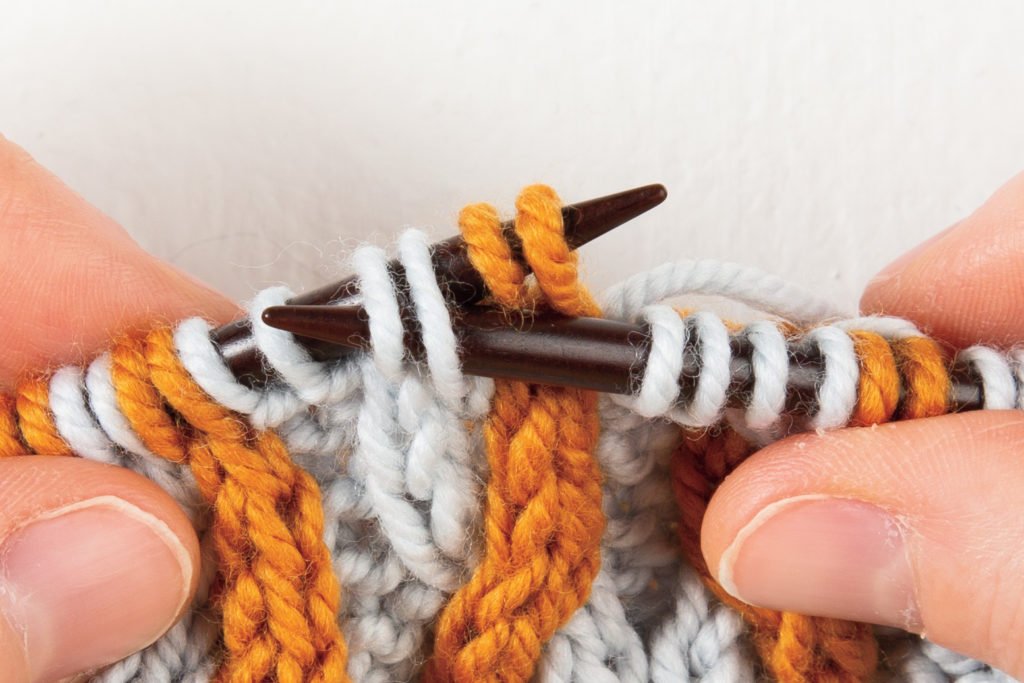
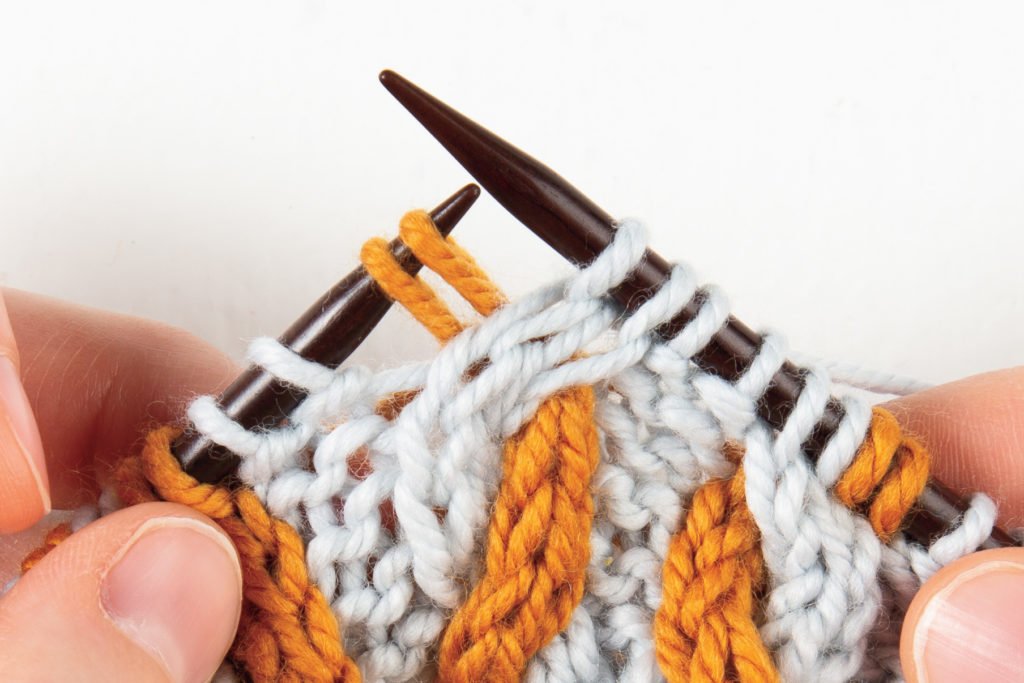
First, the 2-over-2 Left cable. Start by slipping ALL 4 stitches over to the right-hand knitting needle, purlwise.
Step 2
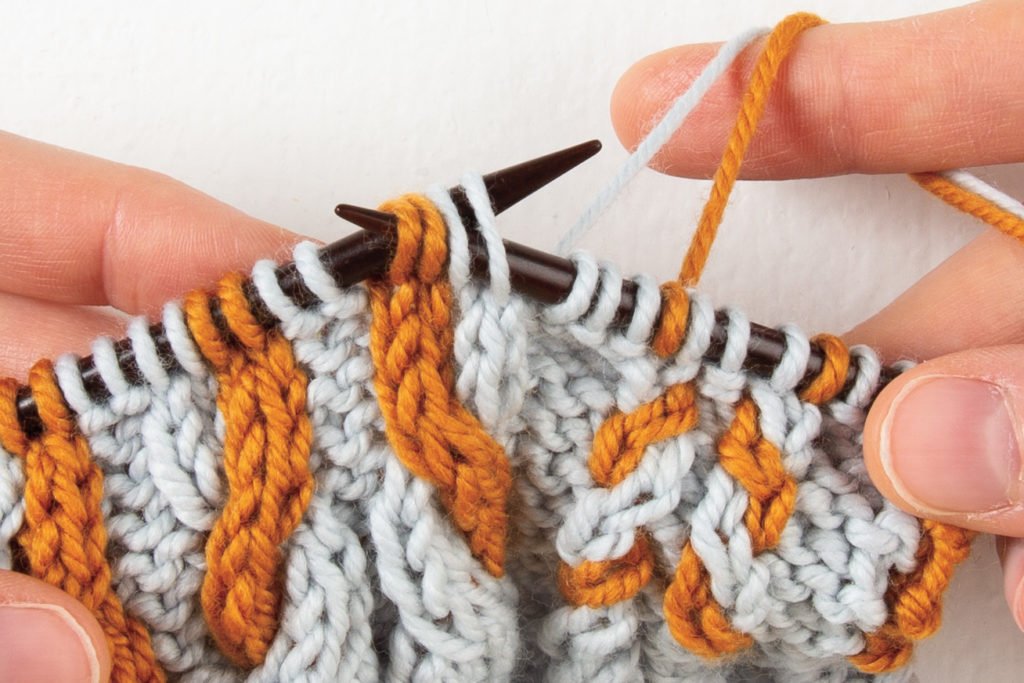
Bring your left-hand needle across the front and stick it into what used to be the first and second stitches, the right 2 stitches on the right-hand needle, as you see above.
Step 3
Now here’s the bit that seems tricky (or scary, even) but it’s really not! Once you do it a few times, it’s easy. As the gif animation shows:
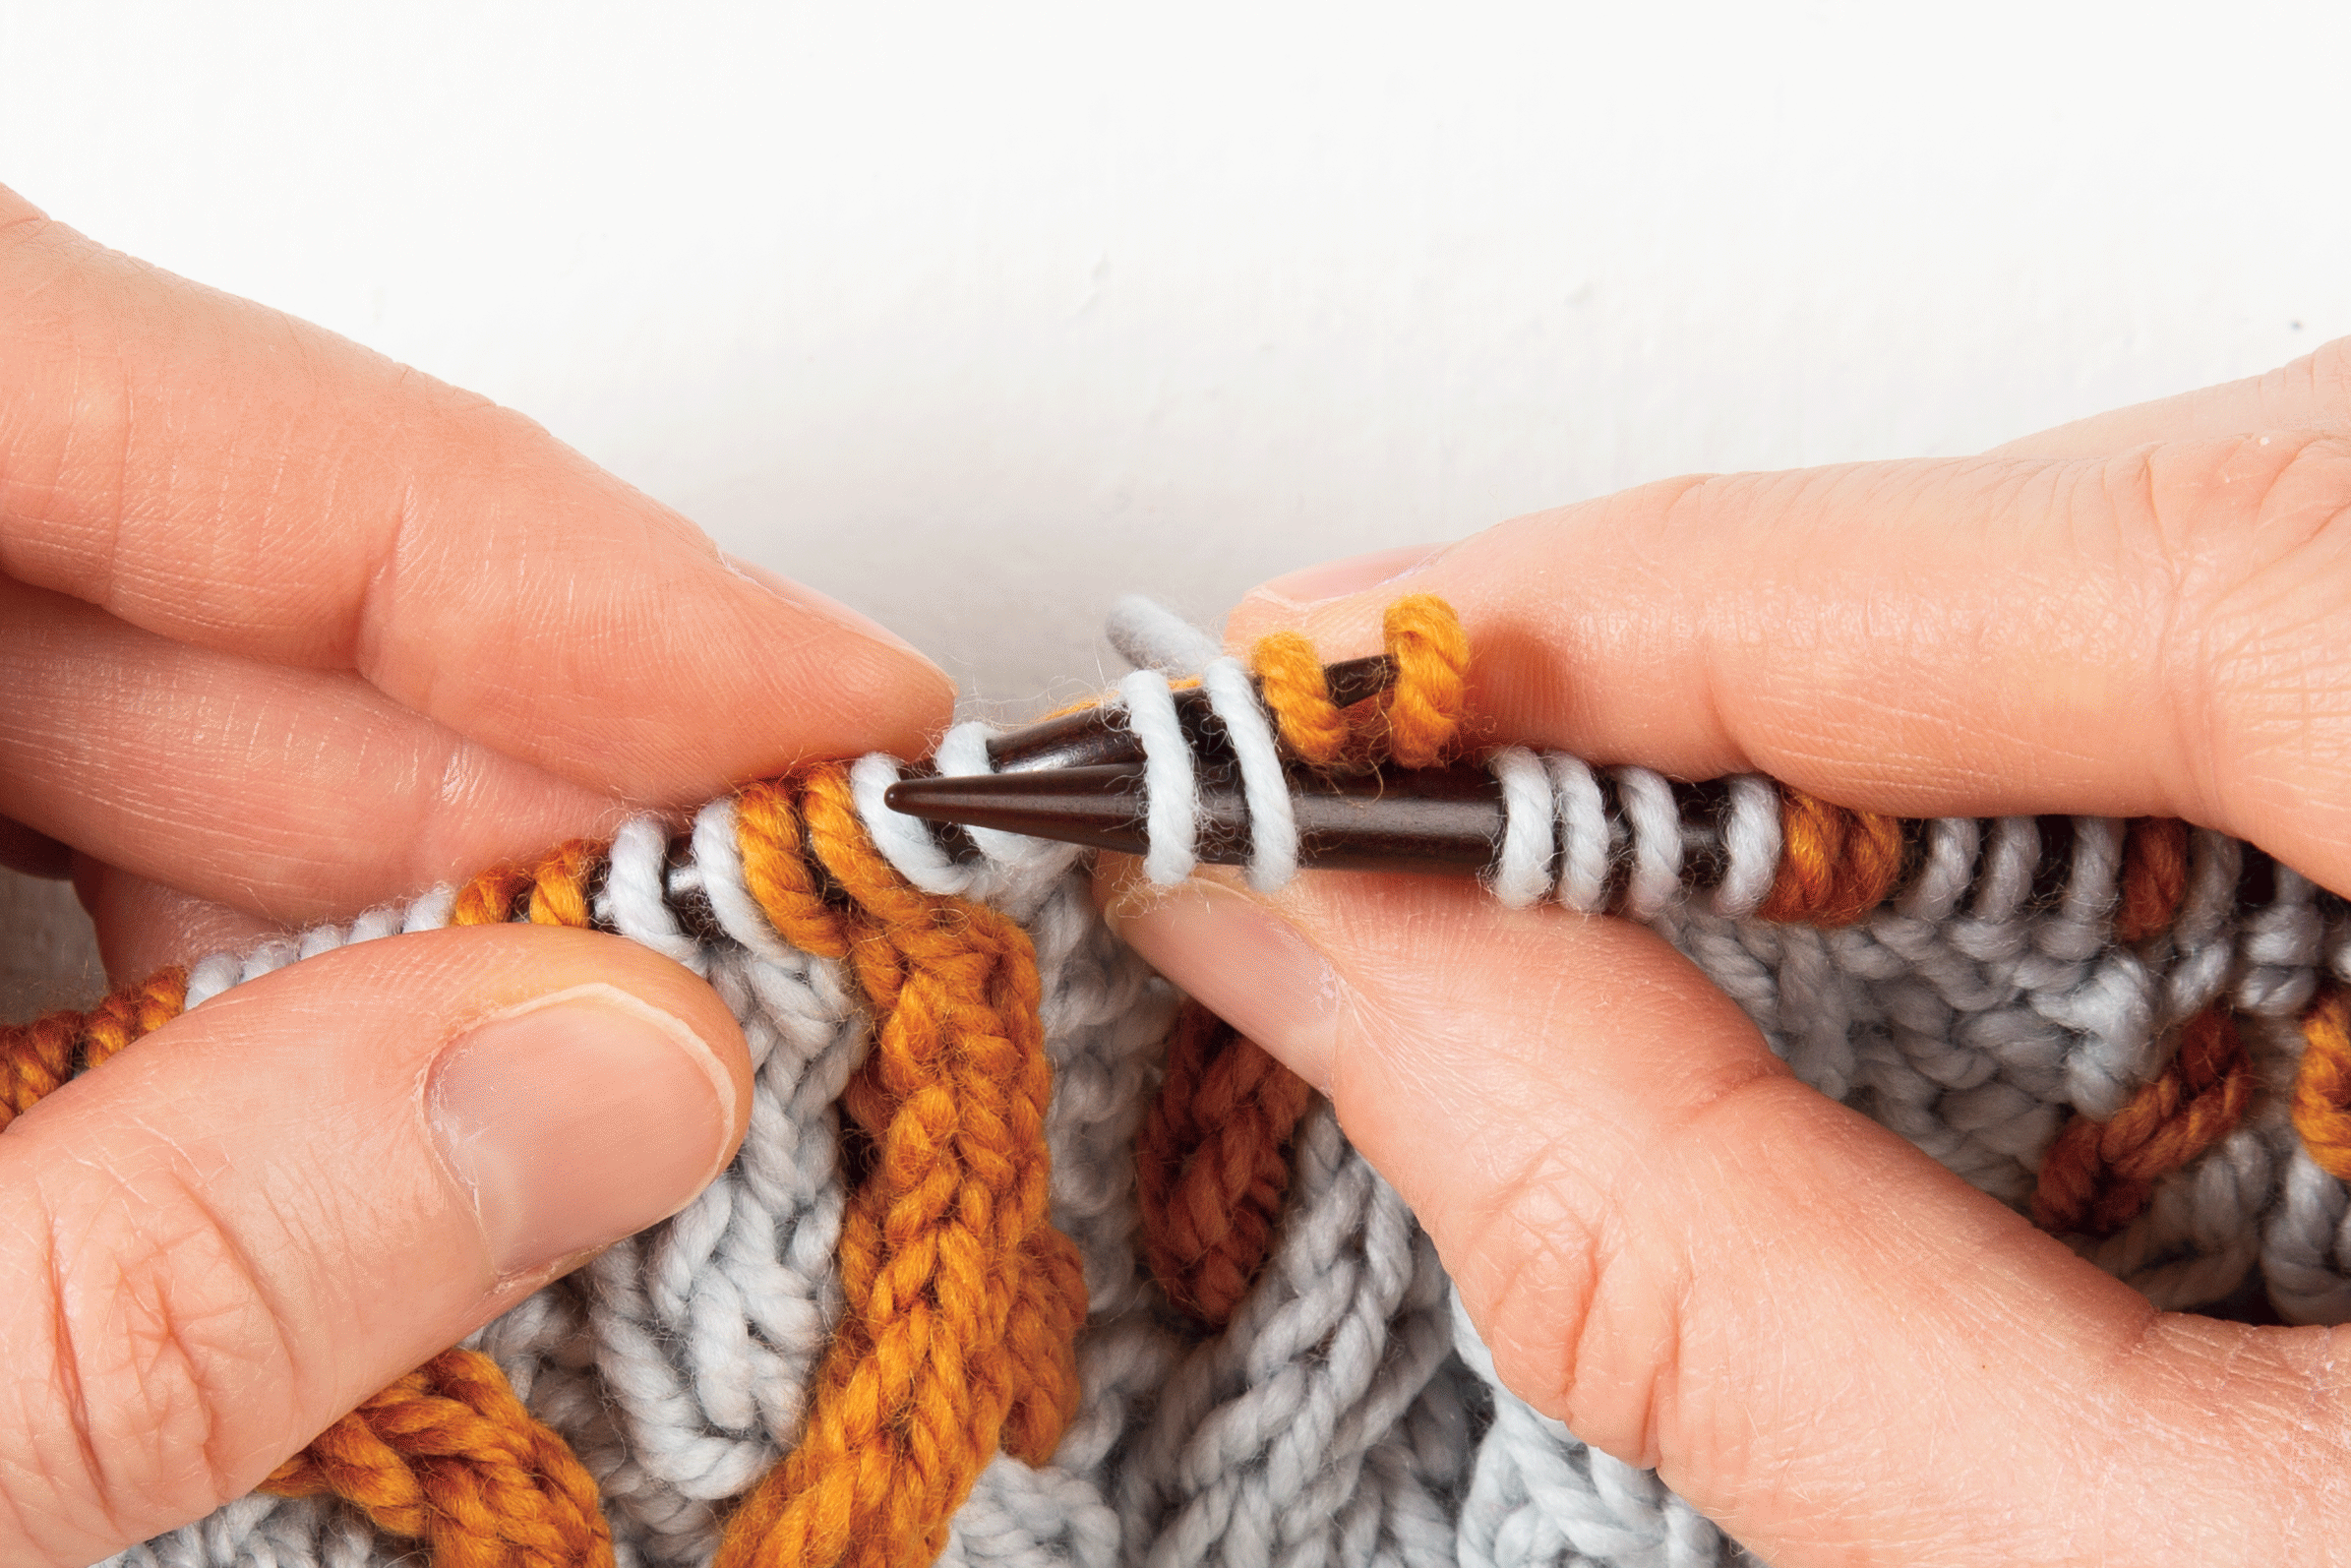
With your left hand holding your knitting in place, slip the right-hand needle out of ALL 4 sts, then slip it immediately back into the 2 loose back stitches.
Those 2 stitches will only be loose (no needle through them) for a second at most, as the needle slips out and then right back in. As long as you’re holding your knitting firmly, there should be no risk of disaster.
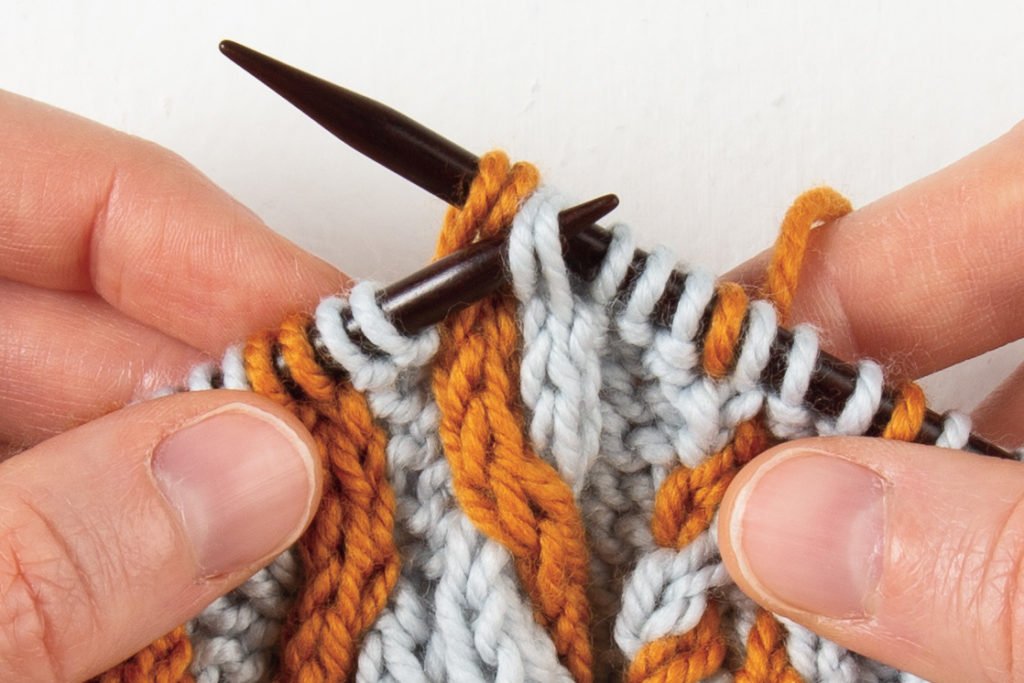
Step 4
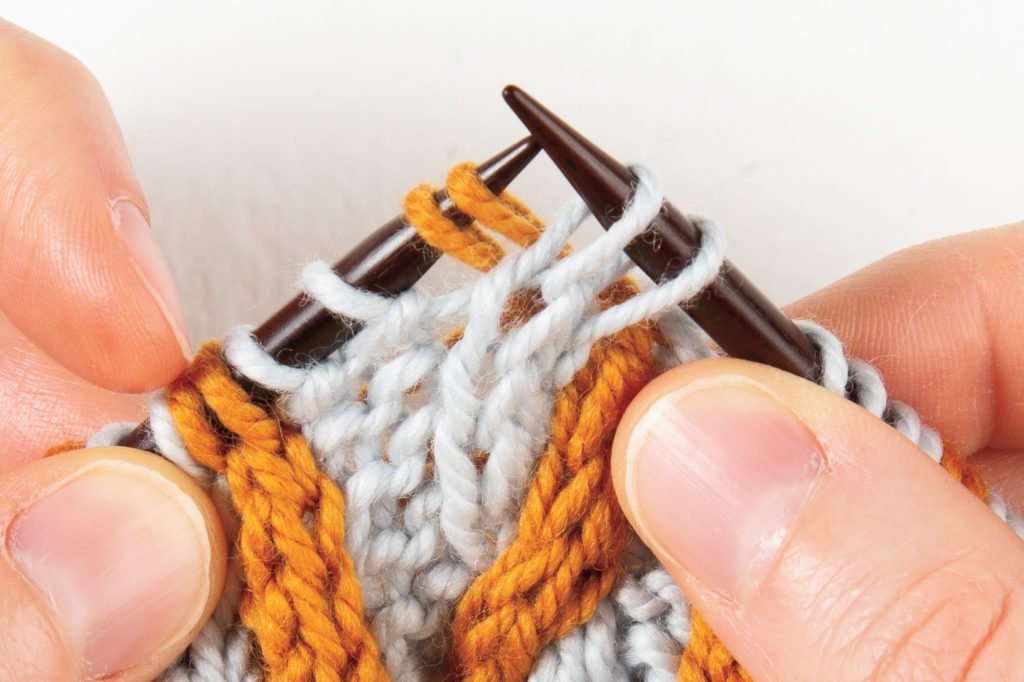
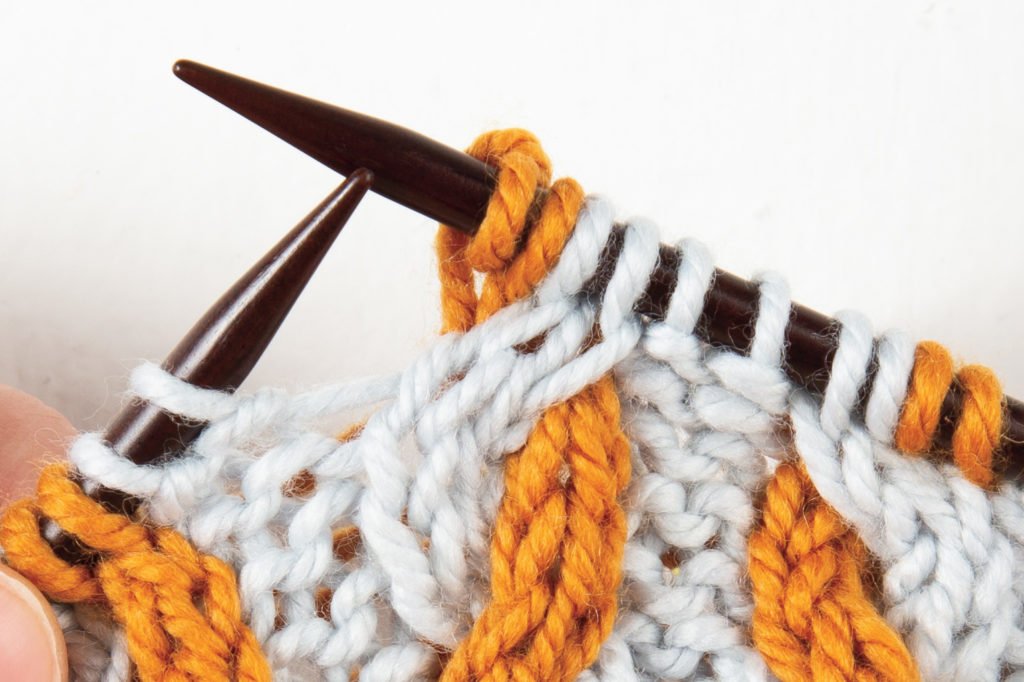
So now you have what used to be the 2 right stitches on the left-hand needle, twisting in front of what was the 2 left stitches, now on the right-hand needle. None have been knit into yet.
Step 5
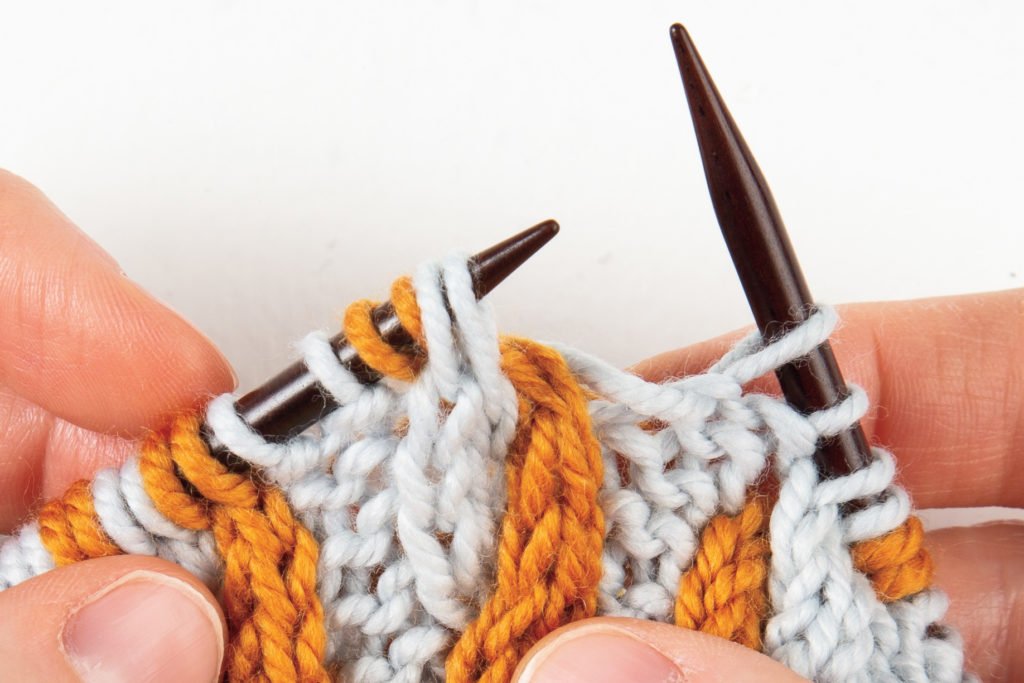
Slip the 2 stitches from the right-hand needle onto the left-hand needle, straight across. Now all 4 stitches are ready to knit, in the new correct order.
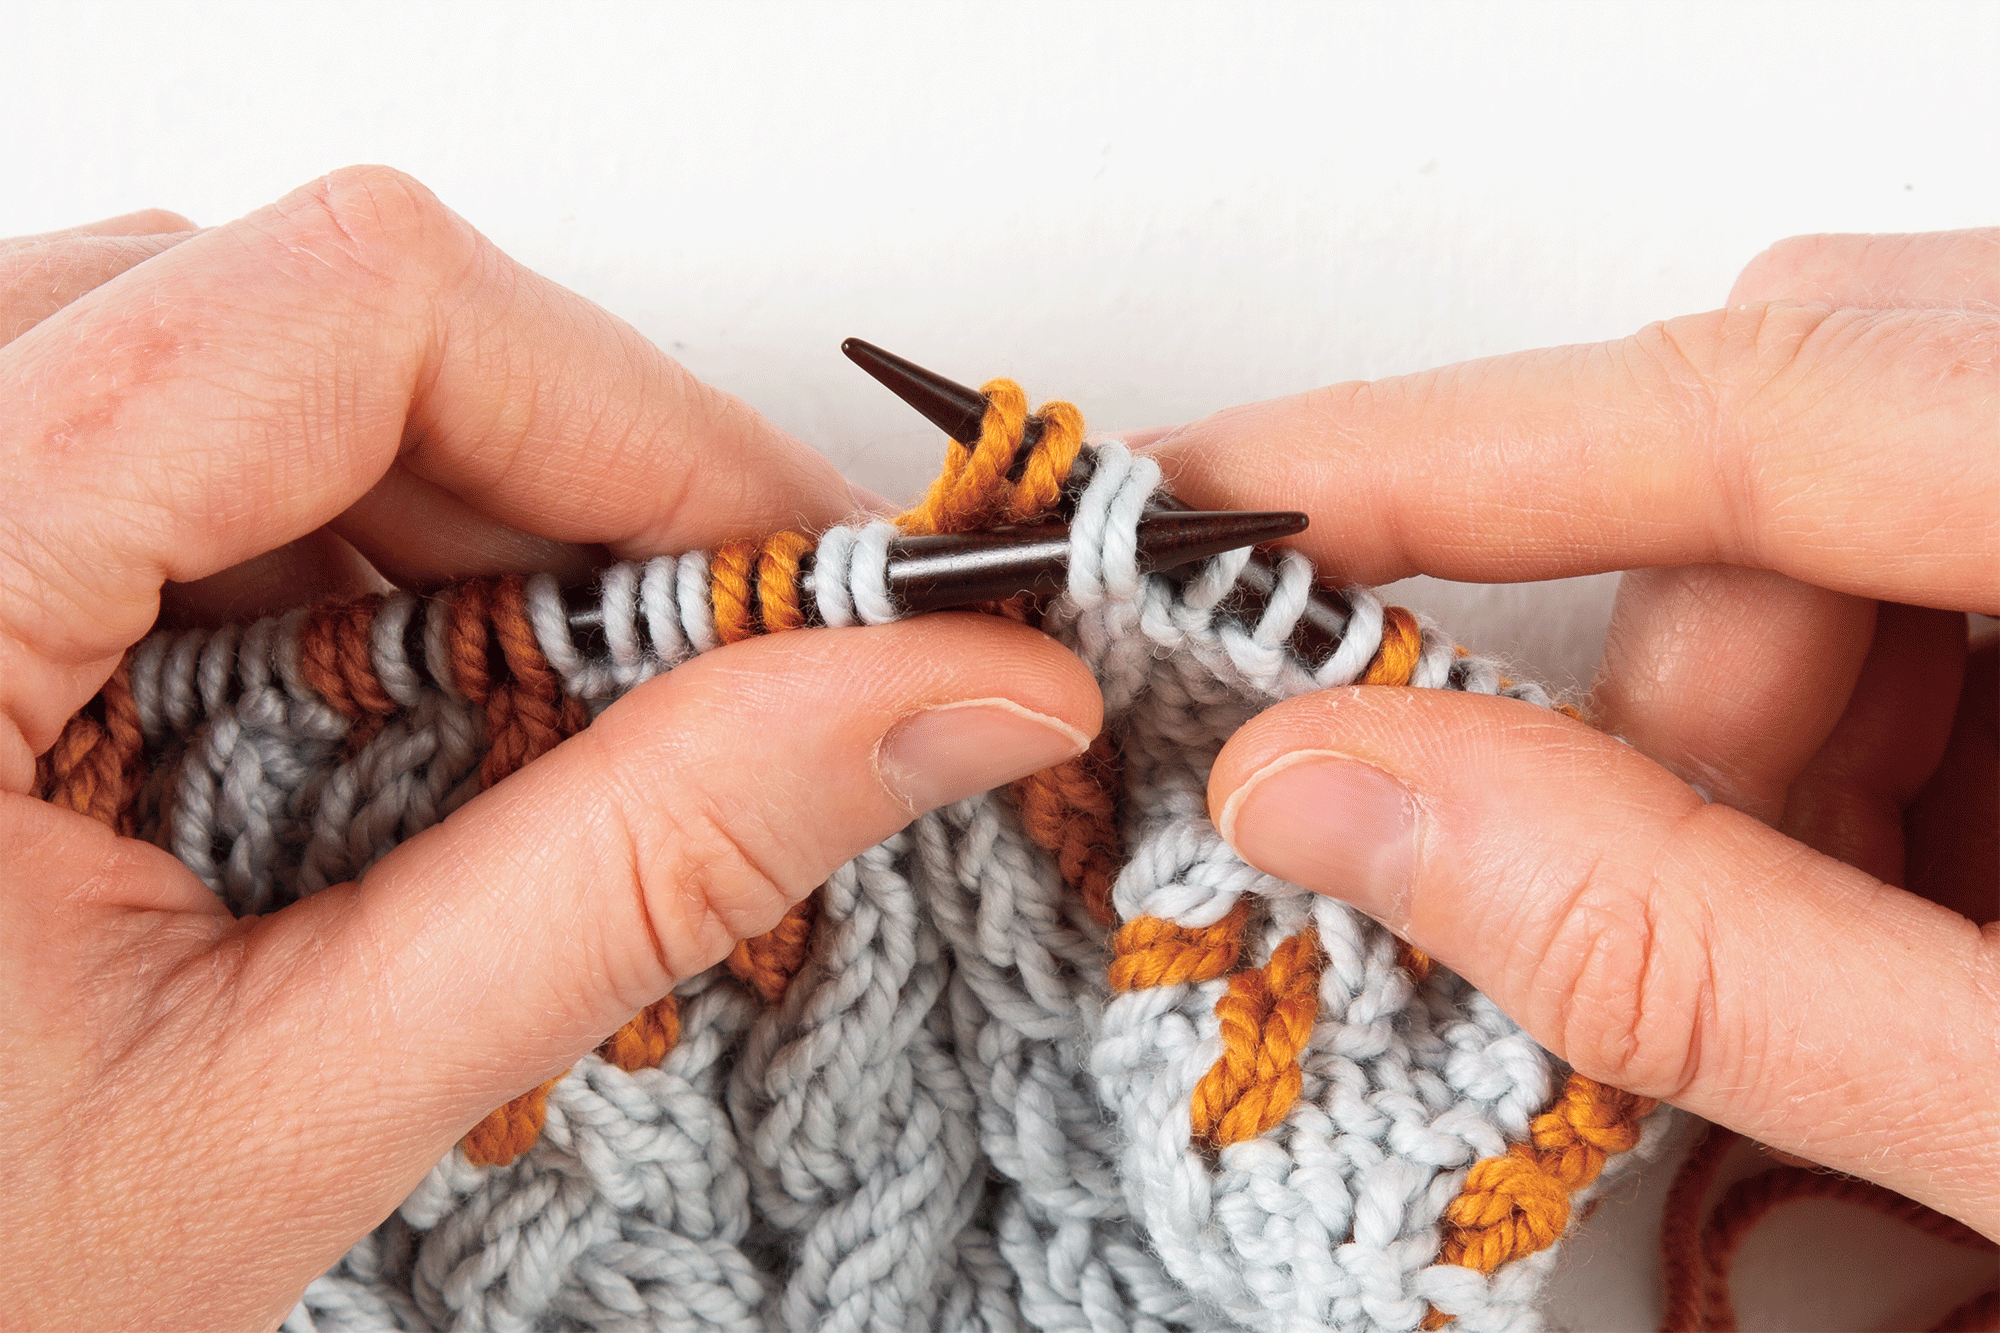
Step 6
Knit the first 2 stitches (the back stitches), then knit the next 2 stitches (the front stitches).
Finished
There’s your no-cable-needle Left cable! The result is the same as with a cable needle, but it’s very quick and easy to do once you get the hang of it.
Right Cable
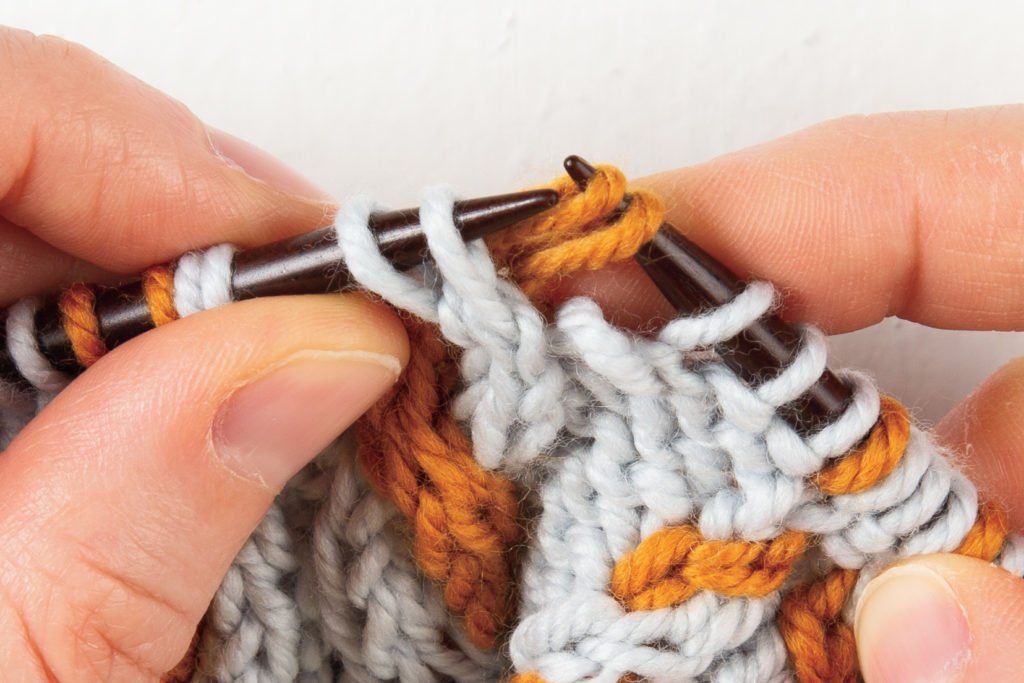
Step 1
And now, a 2-over-2 Right cable without a cable needle. Start by bringing your right-hand needle across the front of your work and through the second pair of stitches, purlwise.
Step 2
Now you’ll work a similar action to the previous cable, but flipped. Here we go (following the gif animation above):
Holding your knitting firmly in your right hand, slip the left-hand needle out of ALL 4 stitches, then slip it immediately back into the back 2 loose stitches.
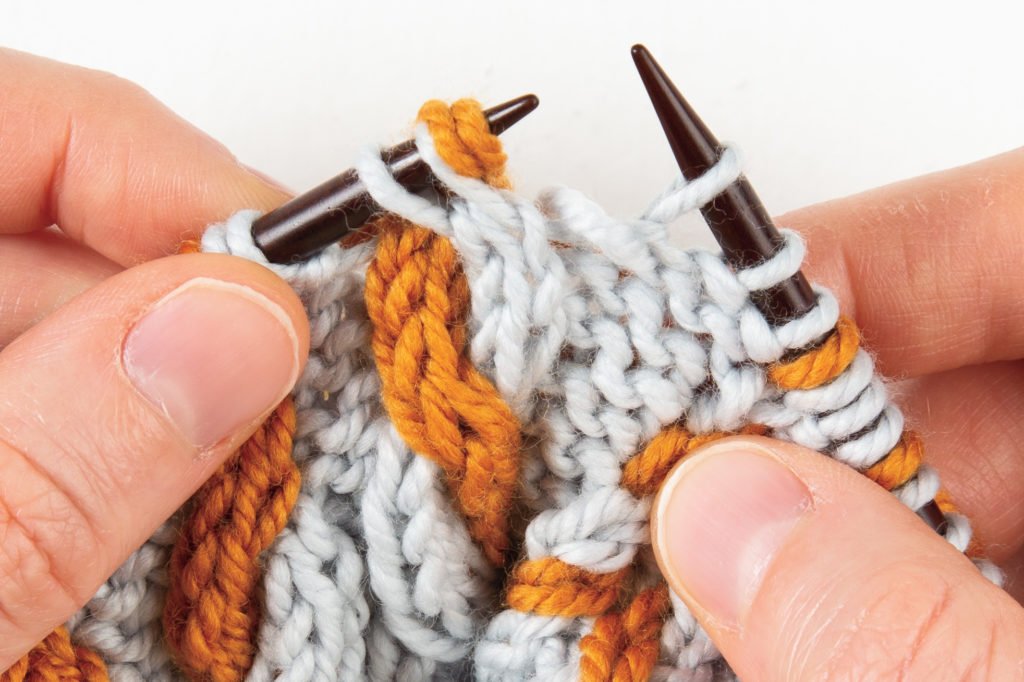
Step 3
Now what used to be the left 2 stitches are twisted in front, on the right-hand needle, and what was the right 2 stitches are twisted in back, on the left-hand needle. No stitches have been worked yet.
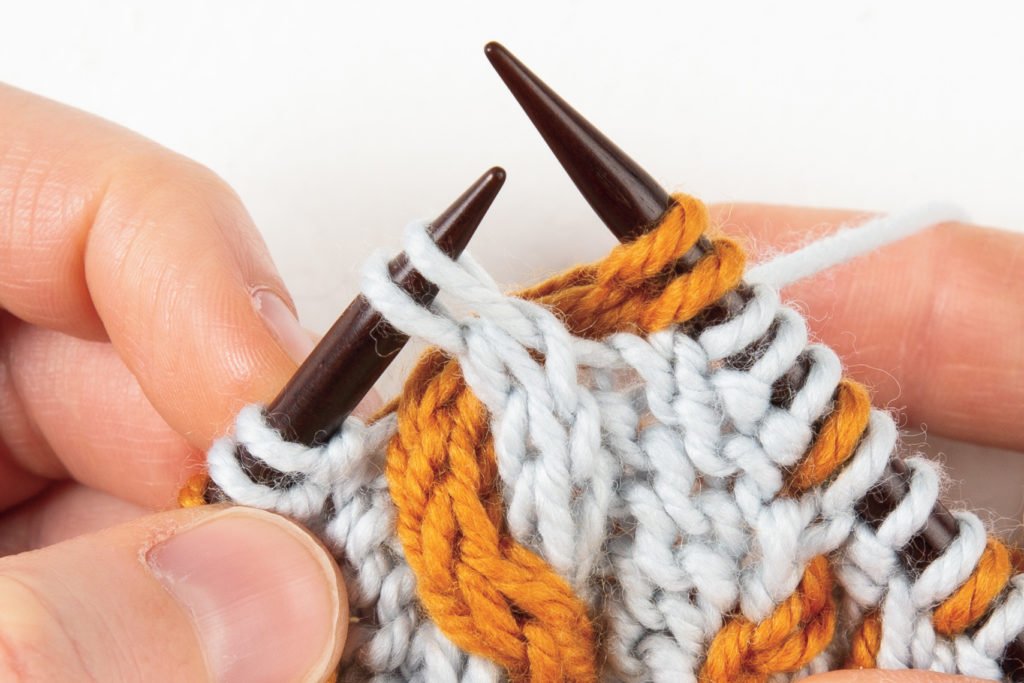
Step 4
Slip the 2 stitches from the right-hand needle back over to the left-hand needle. Now all 4 stitches are ready to knit in their new cable twisted order.
Step 5
Knit the first 2 stitches, the front stitches of your Right twist. Then knit the last 2 stitches, the back stitches.
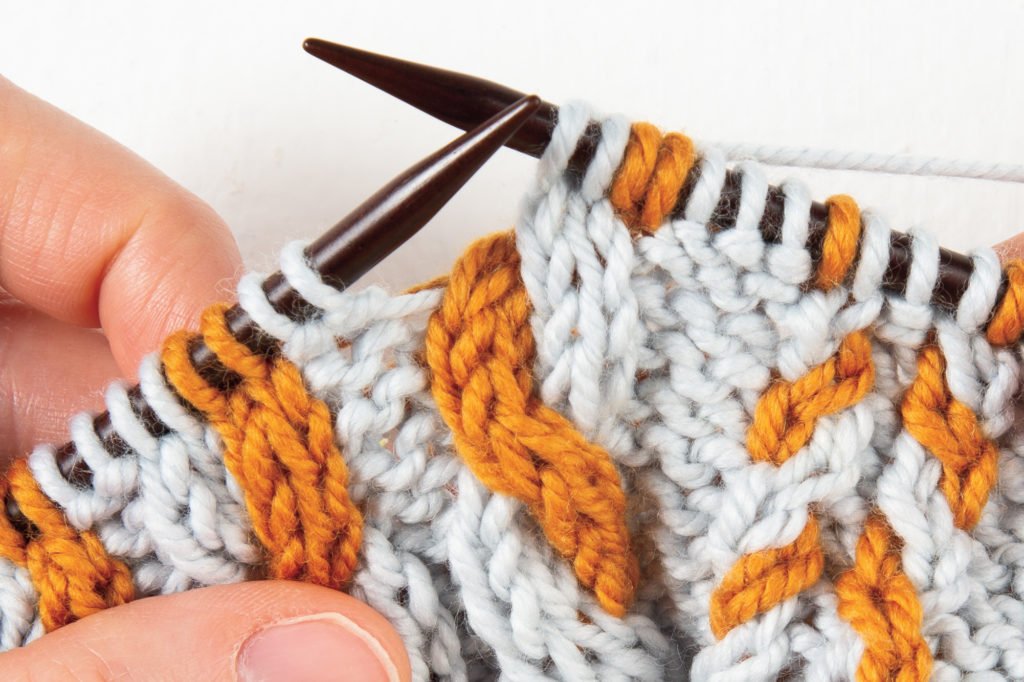
Finished
And here’s the completed Right cable.